A practical guide to smaller image files, faster uploads, and better classroom and web workflows.
When A Good Image Becomes A File Problem
A student takes a clear photo of a completed assignment, but the school platform refuses the upload. A teacher adds several photos to a slide deck, and the file becomes too large to send. A classroom website loads slowly because the images are much bigger than the page needs. In each case, the image may be useful, but the file size creates the problem.
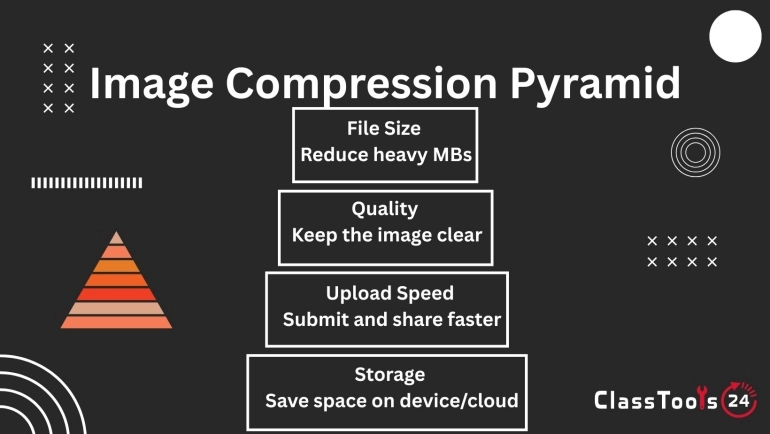
Image compression helps by reducing the size of an image file. It does not always change the visible width and height of the image. Instead, it reduces how much data is stored inside the file. A compressed image can be easier to upload, download, email, store, and display on a webpage.
This matters in school work because students and teachers use images constantly. Photos, screenshots, diagrams, scanned forms, project evidence, certificates, posters, and website images all need to move between devices and platforms. If the file is too heavy, the workflow slows down.
The goal of compression is not to make every image as tiny as possible. The goal is to make the file practical while keeping the important details clear. A compressed assignment photo still needs readable handwriting. A compressed diagram still needs visible labels. A compressed website image should still look clean to the viewer.
What Is Image Compression?
Image compression is the process of reducing the file size of an image. The file size is usually measured in kilobytes or megabytes. A smaller file takes less storage space and usually transfers faster through the internet.
Compression works by storing image information more efficiently. Some image data may be repeated, predictable, or less noticeable to the human eye. Compression methods reduce that data so the file becomes lighter. The exact method depends on the image format and compression type.
For everyday users, the practical meaning is simple: compression makes an image easier to use. A large phone photo can become a smaller file for a school form. A website banner can become lighter so a page loads faster. A worksheet image can be reduced before it is added to a document.
If you need to reduce a file quickly, the Image Compressor can help. If you need more control, an advanced compressor can provide additional settings for quality and file size.
Compression Is Different From Resizing
Many users confuse compression with resizing. They are related, but they are not the same. Resizing changes the dimensions of an image, such as from 4000 pixels wide to 1200 pixels wide. Compression reduces the amount of data used to store the image.
An image can be resized and compressed, but the two steps solve different problems. If a photo is too wide for a website or worksheet, the Image Resizer is useful. If the dimensions are acceptable but the file is too heavy, compression is useful.
In many real workflows, both are helpful. A student may resize a large phone photo first, then compress it before uploading. A teacher may crop unnecessary background, resize the image for a worksheet, and compress the final file so it is easier to share.
Lossless And Lossy Compression
There are two common categories of image compression: lossless and lossy. Understanding the difference helps users choose the right approach for the task.
Lossless compression reduces file size while preserving the original image data. In simple terms, the image can be stored more efficiently without throwing away visual information. PNG often uses lossless compression, which is why it works well for screenshots, diagrams, icons, and images with sharp lines or text.
Lossy compression reduces file size by removing some image information. The idea is to remove details that may not be obvious to the human eye. JPG is a common lossy format. It works well for photos because small changes in photo detail are often less noticeable than they would be in text-heavy screenshots.
Neither type is automatically better. Lossless compression is useful when clarity and exact detail matter. Lossy compression is useful when a smaller file is more important and a small quality reduction is acceptable. The right choice depends on the image and where it will be used.
How Image Compression Works In Simple Terms
Image compression can sound technical, but the basic idea is understandable. An image is made of data. That data describes colors, pixels, patterns, and structure. Compression looks for ways to describe the same image with fewer bytes.
Some methods find repeated patterns. If a large area of an image uses the same color or similar colors, the file may not need to store every single pixel separately. Other methods reduce precision in areas where the viewer is unlikely to notice. Some methods use mathematical steps to separate important detail from less important detail.
For example, a photograph of a classroom wall may contain many similar background colors. Compression can reduce that information without making the photo look very different. But a screenshot with small text needs more care because too much compression can blur letters and make the image harder to read.
This is why users should always check compressed images before submitting or publishing them. The file may be smaller, but the image still needs to serve its purpose.
Use Case 1: Student Assignment Uploads
Situation: A student photographs handwritten homework, a science model, artwork, or a project page. The file looks clear on the phone.
Problem: The classroom platform rejects the image, uploads slowly, or fails before submission. The student may not realize that the file size is the problem.
Solution: The student compresses the image before uploading. If the image is very large, resizing it first can reduce the file further. The student then opens the compressed image and checks that writing, labels, and project evidence are readable.
Result: The file uploads faster and is easier for the teacher to review. The student avoids last-minute stress caused by a technical upload issue.
Use Case 2: Teacher Worksheets And Slides
Situation: A teacher prepares worksheets, lesson slides, revision packs, or classroom notices using several images.
Problem: The final document becomes heavy. It may open slowly, take too long to email, or fail when uploaded to a learning platform.
Solution: The teacher compresses images before adding them to the document. Screenshots and diagrams are checked carefully so text remains readable. Photos can usually handle more compression than text-heavy images.
Result: The document becomes easier to share and open. Students spend less time waiting for files and more time using the material.
Use Case 3: School Websites And Online Pages
Situation: A school page, classroom blog, club website, or student portfolio uses images for announcements, events, projects, and learning resources.
Problem: Large images slow down the page. Visitors on mobile devices or weaker connections may leave before the page finishes loading.
Solution: Images are resized to the display size and compressed before publishing. Photos can often be compressed strongly while still looking acceptable. Diagrams, certificates, and screenshots need more careful checking.
Result: Pages load faster and feel easier to use. This improves the experience for students, parents, teachers, and website visitors.
Use Case 4: Forms, Portals, And Email Attachments
Situation: A parent, student, or teacher needs to upload an ID photo, event image, project evidence, signed form, or classroom document.
Problem: The upload form has a file size limit, or the email attachment becomes too large. The user may not know how to reduce the file safely.
Solution: The image is compressed before upload or attachment. If private information is visible, the user should crop or edit the image before compression.
Result: The file becomes easier to submit. The user also learns to check privacy and readability before sending.
Common Problems Image Compression Solves
- Assignment photos are too large to upload.
- Classroom slides become heavy because of images.
- School website pages load slowly.
- Email attachments exceed size limits.
- Forms reject large image files.
- Student portfolios load slowly on mobile devices.
- Teachers need lighter worksheets and handouts.
- Images take too much storage space.
Comparison: Compressed And Uncompressed Images
| Task | Compressed Image | Uncompressed Or Large Image |
|---|---|---|
| Assignment upload | Uploads faster and is less likely to fail. | May be rejected or take too long. |
| Worksheet sharing | Document is easier to email and open. | File may become heavy and slow. |
| Website display | Page loads faster for visitors. | Page may feel slow, especially on mobile. |
| Storage | Uses less disk or cloud space. | Takes more storage over time. |
| Image quality | Needs checking after compression. | Usually keeps more detail but may be too heavy. |
How To Compress Images Responsibly
- Start with the clearest original image.
- Crop unnecessary background if it is not needed.
- Resize the image if the dimensions are much larger than required.
- Compress the image using a suitable quality level.
- Open the compressed file and check important details.
- Compare the original and compressed versions if quality matters.
- Keep the original until the task is finished.
- Upload, email, or publish the compressed copy.
This workflow protects quality. It also prevents a common mistake: compressing the same image repeatedly. Repeated lossy compression can reduce quality more than expected. It is usually better to return to the original file and create a new compressed version when needed.
Quality And Trust Checks
After compression, always inspect the image. For assignment photos, check handwriting and labels. For worksheets, check diagrams and small text. For posters, check faces and important details. For website images, check how the image looks on both desktop and mobile screens.
Compression should support communication. If the file becomes small but unreadable, it has failed the task. A slightly larger image that remains clear is often better than a tiny file that loses meaning.
Privacy Reminder
Compressing an image does not remove private information. Student names, faces, login details, school forms, addresses, grades, and background details may still be visible after compression. If private content should not be shared, remove or hide it before uploading the image.
Students and teachers should be especially careful with classroom photos and documents. A tool can reduce file size, but the user must still check what the file contains.
Final Thought
Image compression is useful because it solves a very common digital problem: good images that are too heavy to use comfortably. It helps students submit work, teachers share materials, and websites load faster.
The best approach is simple. Keep the image clear enough for its purpose, reduce unnecessary size, and check the result before sharing. When compression is used with care, it saves time without weakening the quality of the work.