A practical school workflow for reducing image file size before uploading assignments, sharing forms, building slides, or publishing web projects.
Why Image Compression Matters In School Work
Images are part of everyday classroom work now. Students upload project photos, teachers prepare worksheets, schools publish updates, and class presentations often include screenshots, diagrams, posters, and scanned notes. The problem is that many images are much larger than they need to be. A single phone photo can be several megabytes, and a few large images can make a document, slide deck, or form submission difficult to upload or share.
This use case explains how the Image Compressor helps reduce image file size for assignments, forms, presentations, and web projects. The goal is not to make images look perfect for advertising. The goal is to make school images easier to upload, download, email, store, and view while keeping the important details clear.
For students, compression can prevent upload failures and slow submissions. For teachers, it can make lesson materials lighter and easier to distribute. For school teams, it can improve page speed when images are used on websites or resource pages. In each case, the image still supports learning, but the file becomes more practical to use.
Assignment Uploads And Student Submissions
One of the most common reasons students need image compression is assignment submission. A student may take a photo of a handwritten solution, a science observation, a project model, artwork, or a notebook page. The image may look fine on the phone, but the file size can be too large for the school platform. Some forms reject large uploads. Some learning systems take too long to process them. Sometimes students try again several times without realizing the file size is the problem.
Compressing the image before submission solves many of these issues. A smaller file uploads faster and is less likely to fail. It also makes the teacher's review easier because the file opens more quickly. The important point is to keep the image readable. If the assignment includes writing, labels, diagrams, or evidence, students should check the compressed image before submitting it.
A good student workflow is simple: take the image, crop unnecessary edges if needed with the Image Cropper, reduce dimensions if the photo is very large with the Image Resizer, and then compress it. This keeps the final file focused, smaller, and easier to upload.
Forms, Surveys, And School Portals
Many school forms ask users to upload images. These may include ID photos, event images, project evidence, club materials, competition entries, or homework files. If the image is too large, the form may show an error or fail silently. This creates frustration for students, parents, and staff.
An image compressor is useful before uploading to Google Forms, school portals, registration forms, classroom activity forms, or online project submission pages. It reduces the chance of a failed upload and helps the form load faster for the person reviewing it. This is especially helpful when many students submit images at the same time.
Teachers can also give students a simple instruction: before uploading a photo, compress it once and check that the content is still clear. This small habit saves time and reduces repeated support messages like “the file will not upload” or “the form keeps rejecting my image.”
Presentations And Classroom Slides
Presentations often become heavy because of images. A student may add large photos to every slide. A teacher may include full-size screenshots in a lesson deck. The presentation may still open, but it can become slow, hard to share, or difficult to upload to a classroom platform.
Compressing images before adding them to slides keeps the presentation lighter. This matters when students send their work to a teacher, present from a shared device, or upload the file for grading. It also helps teachers who reuse slide decks across multiple classes. A lighter file is easier to move, store, and open during a lesson.
Image quality still matters. A compressed image used on a slide should be clear enough for the classroom display. Text in screenshots should remain readable. Diagrams should still show labels. Photos should not become so blurry that they lose meaning. Compression should support the presentation, not damage it.
Web Projects And Classroom Pages
Image compression is also important for school websites, student web projects, classroom blogs, digital portfolios, and online resource pages. Large images slow down pages. Slow pages are harder to use, especially on mobile devices or weaker internet connections. When a page contains several uncompressed images, users may leave before the content fully loads.
For a student portfolio, compressed images help classmates and teachers open the page quickly. For a classroom page, they make resources easier to access. For school announcements, smaller images reduce loading delays. This is not only a technical issue. It affects whether people can actually use the material comfortably.
Before publishing an image online, users should ask two questions: does the image need to be this large, and is it still clear after compression? If the answer is yes to clarity and no to unnecessary size, the image is ready for better web use.
Comparison: Why This Workflow Is Better
| School Need | Using ClassTools24 Image Compressor | Using Large Original Images |
|---|---|---|
| Assignment upload | Smaller files upload faster and fail less often. | Large files may be rejected or take too long. |
| Forms and portals | Compressed images are easier for systems to process. | Oversized images can slow or block submission. |
| Presentations | Slide decks stay lighter and easier to share. | Files become heavy when many full-size images are added. |
| Web projects | Pages load faster on desktop and mobile devices. | Large images can create slow, frustrating pages. |
| Classroom workflow | Teachers and students can fix file-size problems quickly. | Users may waste time trying to upload the same file again. |
When To Compress And When To Resize
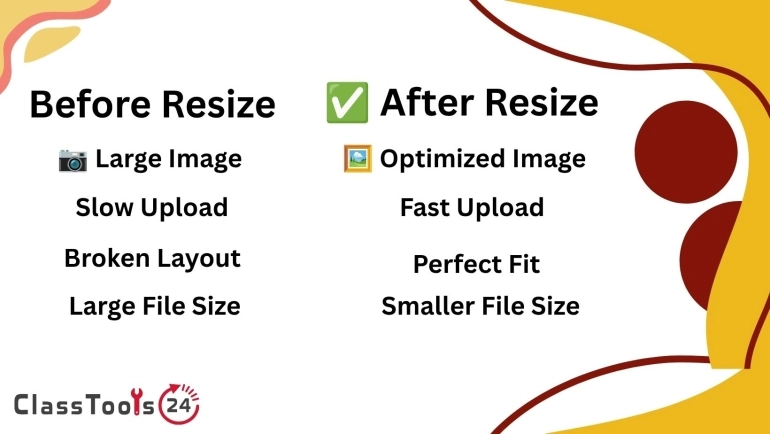
Compression and resizing are related, but they are not the same. Compression reduces the file size. Resizing changes the image dimensions. If a photo is extremely large, resizing first may make sense. If the image dimensions are already fine but the file is still too heavy, compression is usually the right step.
For example, a phone photo may be much larger than needed for a worksheet or presentation. In that case, use the Image Resizer first, then compress the image. If a screenshot already has the right dimensions but needs to be smaller for upload, use the compressor directly. If only one part of the image matters, crop it first so the final file contains less unnecessary visual space.
For document workflows, students and teachers may compress images before turning them into PDFs with the JPG to PDF Converter or PNG to PDF Converter. This can help keep the final PDF lighter and easier to submit.
Quality Checks Before Sharing
After compression, users should open the image and inspect it. This is especially important for school work because images often contain information that must be read or graded. Look at small text, handwritten notes, labels, charts, diagrams, and any evidence that supports the assignment.
If the image looks too blurry, use a lighter compression level or start from a better original image. If the image includes extra background, crop it before compressing. If the image is too large in dimensions, resize it before compressing. These small steps can produce a cleaner final result than compression alone.
Teachers can also model this process for students. Instead of saying only “make the file smaller,” they can explain that the image must stay useful. A compressed file should still communicate the work clearly.
Privacy And Responsible Use
Before compressing or uploading any image, users should check what the image contains. School images may include student names, faces, grades, classroom displays, login details, or personal information. Compression does not remove private information. It only reduces file size.
If an image contains sensitive details, crop or edit the image before sharing it. Do not upload private student records, confidential documents, or personal information unless school policy allows it. For student projects, teachers should guide learners to share only what is necessary for the assignment.
For more background, see what image compression means and why image compression matters. These guides explain how compression supports faster, lighter, and more practical digital files.
Frequently Asked Questions
Can students compress images before submitting assignments?
Yes. Students can compress project photos, screenshots, scanned notes, artwork, and evidence images before uploading them to school platforms or forms.
Will compression make the image blurry?
It can if the image is compressed too much. Always check that text, diagrams, and important details are still clear before submitting or publishing.
Should I resize or compress first?
If the image dimensions are very large, resize first and then compress. If the dimensions are already fine, compression alone may be enough.
Can teachers use this for worksheets and slides?
Yes. Teachers can compress images before adding them to worksheets, lesson slides, newsletters, and classroom materials to keep files easier to share.
Is compression useful for school websites?
Yes. Compressed images usually load faster, which improves access for students, parents, and teachers using desktop or mobile devices.
Final Thought
Image compression is a practical step in modern school work. It helps students submit assignments, helps teachers share materials, and helps school pages load faster. The best result is not just the smallest file. It is a file that is easier to use while still being clear enough for learning, review, and communication.