Practical ways to enlarge images for school projects, classroom posters, worksheets, presentations, portfolios, and beginner design tasks.
Image Enlarger Use Cases In Real School And Design Work
A student adds a small image to a presentation, but it looks weak on the slide. A teacher wants to use a diagram in a worksheet, but the labels are too small for students to read. A beginner designer prepares a school event poster, but the logo or photo is too tiny for the layout.
These problems are common when images come from phones, screenshots, downloads, thumbnails, or older files. The image may be useful, but the size does not match the job. The Image Enlarger helps students, teachers, and beginner designers increase image size for practical education and design workflows.
Image enlargement is not magic. A very blurry or tiny image cannot become perfect just by making it bigger. But when the source image is reasonably clear, enlarging it carefully can make it more useful for slides, worksheets, posters, portfolios, classroom displays, and school communication materials.
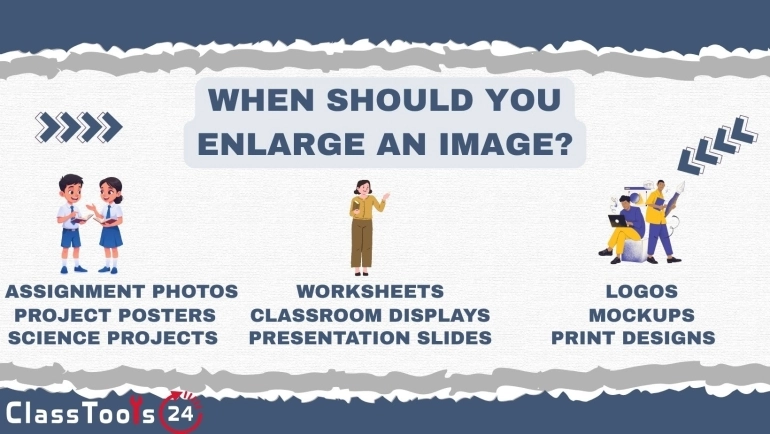
Use Case 1: Student Presentations
A student preparing a science, history, or literature presentation may find an image that explains the topic well, but it is too small for the slide. If the student simply drags the image larger inside the slide editor, it may look stretched, uneven, or blurry.
Using an image enlarger first gives the student more control. The image can be enlarged before being placed into the presentation. After downloading the enlarged version, the student should insert it into the slide and check whether classmates can see the important details from a normal viewing distance.
This is useful for project photos, source images, diagrams, maps, charts, and visual examples. If the enlarged image becomes too heavy to submit, the Image Compressor can reduce the file size before upload.
Use Case 2: Teacher Worksheets And Handouts
Teachers often use visuals to make worksheets easier to understand. A diagram, screenshot, map, timeline, or classroom photo may explain an idea faster than a long paragraph. But if the image is too small, students may struggle to read the labels or inspect the details.
An image enlarger helps teachers prepare visuals before placing them into worksheets and handouts. A small diagram can be enlarged, checked for readability, and then added to the document. A screenshot can be made larger before it becomes part of step-by-step instructions.
If the image has extra blank space, the Image Cropper can remove it before enlargement. If the worksheet needs a specific image size, the Image Resizer can help adjust the final dimensions.
Use Case 3: Classroom Posters And Displays
Posters and classroom displays need images that are large enough to be seen from a distance. A small logo, event photo, classroom icon, or project image may look fine on a screen but appear weak when printed or displayed on a board.
Beginner designers and students can use an image enlarger while preparing event posters, club notices, classroom rules, project boards, and display materials. Enlarging the image before placing it into the design can make the layout more balanced.
The image should still be checked carefully. If it becomes too pixelated, the designer may need a better source file. For printed posters, test the design before making multiple copies. A visual that looks acceptable on a phone may not work well at poster size.
Use Case 4: Student Portfolios
Student portfolios often include project images, artwork, scanned pages, certificates, screenshots, and web design previews. Some images may be saved at a small size and look awkward beside larger portfolio items. This can make the page feel uneven even when the work itself is strong.
Using the Image Enlarger can help students make portfolio visuals more consistent. The image can be enlarged to fit the layout better, then checked for clarity. This is useful for digital portfolios, school project pages, and beginner design showcases.
A portfolio is not only about storing work. It is about presenting learning clearly. Enlarged images should help the viewer inspect the work without making the page feel blurry or careless.
Use Case 5: Beginner Design Tasks
Beginner designers often work with whatever images they are given: small logos, downloaded icons, classroom photos, event graphics, or screenshots. The challenge is making those images fit a poster, slide, flyer, or web layout without damaging the design.
An image enlarger can help when the image is slightly too small for the design space. It gives the designer a prepared version before layout work begins. This is better than repeatedly stretching the image inside a design tool and hoping it still looks acceptable.
Beginner designers should also learn when not to enlarge. If the original is a tiny thumbnail or already pixelated, it may be better to find a higher-quality source image. Good design judgment includes knowing when enlargement will help and when it will not.
Common Enlargement Problems This Solves
- Small images look weak on classroom presentation slides.
- Worksheet diagrams are too tiny for students to read.
- Project photos do not fit poster or display layouts.
- Portfolio images look inconsistent in size.
- Classroom event graphics need larger visuals.
- Screenshots need to be easier to see in instructions.
- Small design assets need better layout balance.
- Students need clearer visuals for online submissions.
Comparison: Enlarging Before Design Vs Manual Stretching
| Task | Using Image Enlarger First | Manual Stretching In A Document Or Slide |
|---|---|---|
| Presentation image | Image is prepared before being placed on the slide. | Dragging corners may make the visual look soft or uneven. |
| Worksheet diagram | Teacher can check readability before finalizing the handout. | Labels may become hard to read after quick scaling. |
| Poster design | Designer can test whether the image works at a larger size. | The layout may hide quality problems until printing. |
| Portfolio image | Student can make visual sizes more consistent. | The page may look uneven with tiny images beside large ones. |
| Classroom display | Visuals are easier to prepare for board or print use. | Small images may look weak when displayed from a distance. |
Best Workflow For Students, Teachers, And Designers
- Start with the clearest original image available.
- Crop unnecessary background or private details before enlargement.
- Enlarge only as much as the task needs.
- Check the image inside the actual slide, worksheet, poster, or portfolio layout.
- Compress the final image if the file becomes too large to upload or share.
This workflow helps avoid the most common mistake: making an image bigger without checking whether it is still useful. Enlarged images should support the final task. They should not distract with blur, pixelation, or unreadable details.
Quality And Readability Checks
After enlargement, users should inspect the image at the size where it will be used. For presentations, check the slide view. For worksheets, check the document or print preview. For portfolios, check the page layout. For posters, view the design large enough to judge whether the image still works.
Pay close attention to small text, labels, borders, faces, diagrams, arrows, and evidence details. If those parts become unclear, enlargement may not be the right fix. A better source image, a cleaner screenshot, or a different visual may be needed.
This is especially important for school materials because images often carry learning information. A blurry diagram or unreadable screenshot can confuse students instead of helping them.
Privacy And Responsible Image Use
Before enlarging and sharing any image, check what it contains. Classroom images may include student names, faces, grades, login details, private documents, or background information that should not be published. Enlargement can make private details more visible, so review the image carefully.
If private details are visible, crop them before enlarging. If the image will be used publicly, make sure it is appropriate and allowed for that use. Responsible image preparation protects students and keeps school materials professional.
For text-heavy images, the Image to Text Converter may help when editable text is needed. For file preparation, the Image Converter can change formats, and the Image Compressor can reduce the final file size after enlargement.
Frequently Asked Questions
Can students use an Image Enlarger for presentations?
Yes. Students can enlarge small images before adding them to slides, posters, portfolios, and project displays.
Can teachers enlarge images for worksheets?
Yes. Teachers can enlarge diagrams, screenshots, maps, and classroom visuals, then check that labels and details remain readable.
Will enlargement make a blurry image clear?
Not always. Enlargement works best when the original image is already reasonably clear. A very blurry or tiny image may still look poor when enlarged.
Should I crop before enlarging?
Yes, if the image has extra background, private details, or unnecessary space. Cropping first usually gives a cleaner enlarged result.
Can beginner designers use this for posters?
Yes. Beginner designers can enlarge images for school posters, event materials, classroom displays, and simple design layouts.
What if the enlarged image becomes too large to upload?
Use an image compressor after enlargement to reduce file size before uploading, emailing, or submitting the final image.
Final Thought
Image enlargement helps when a useful visual is too small for the work in front of you. Students can make presentation images easier to see. Teachers can prepare clearer worksheets. Beginner designers can build better posters and portfolios. The best result is not simply a bigger image. It is an image that fits the task, stays readable, and supports the learning or design goal.